? 优质资源分享 ?
| 学习路线指引(点击解锁) | 知识定位 | 人群定位 |
|---|---|---|
| ? Python实战微信订餐小程序 ? | 进阶级 | 本课程是python flask+微信小程序的完美结合,从项目搭建到腾讯云部署上线,打造一个全栈订餐系统。 |
| ?Python量化交易实战? | 入门级 | 手把手带你打造一个易扩展、更安全、效率更高的量化交易系统 |
OAuth2客户端的配置参数非常多,虽然Id Server通过控制台可视化解决了创建OAuth2客户端的问题。但是如何进一步降低OAuth2的使用难度,把创建的OAuth2客户端转化为配置成为了刚需,从技术角度上感觉也并不是很难实现。
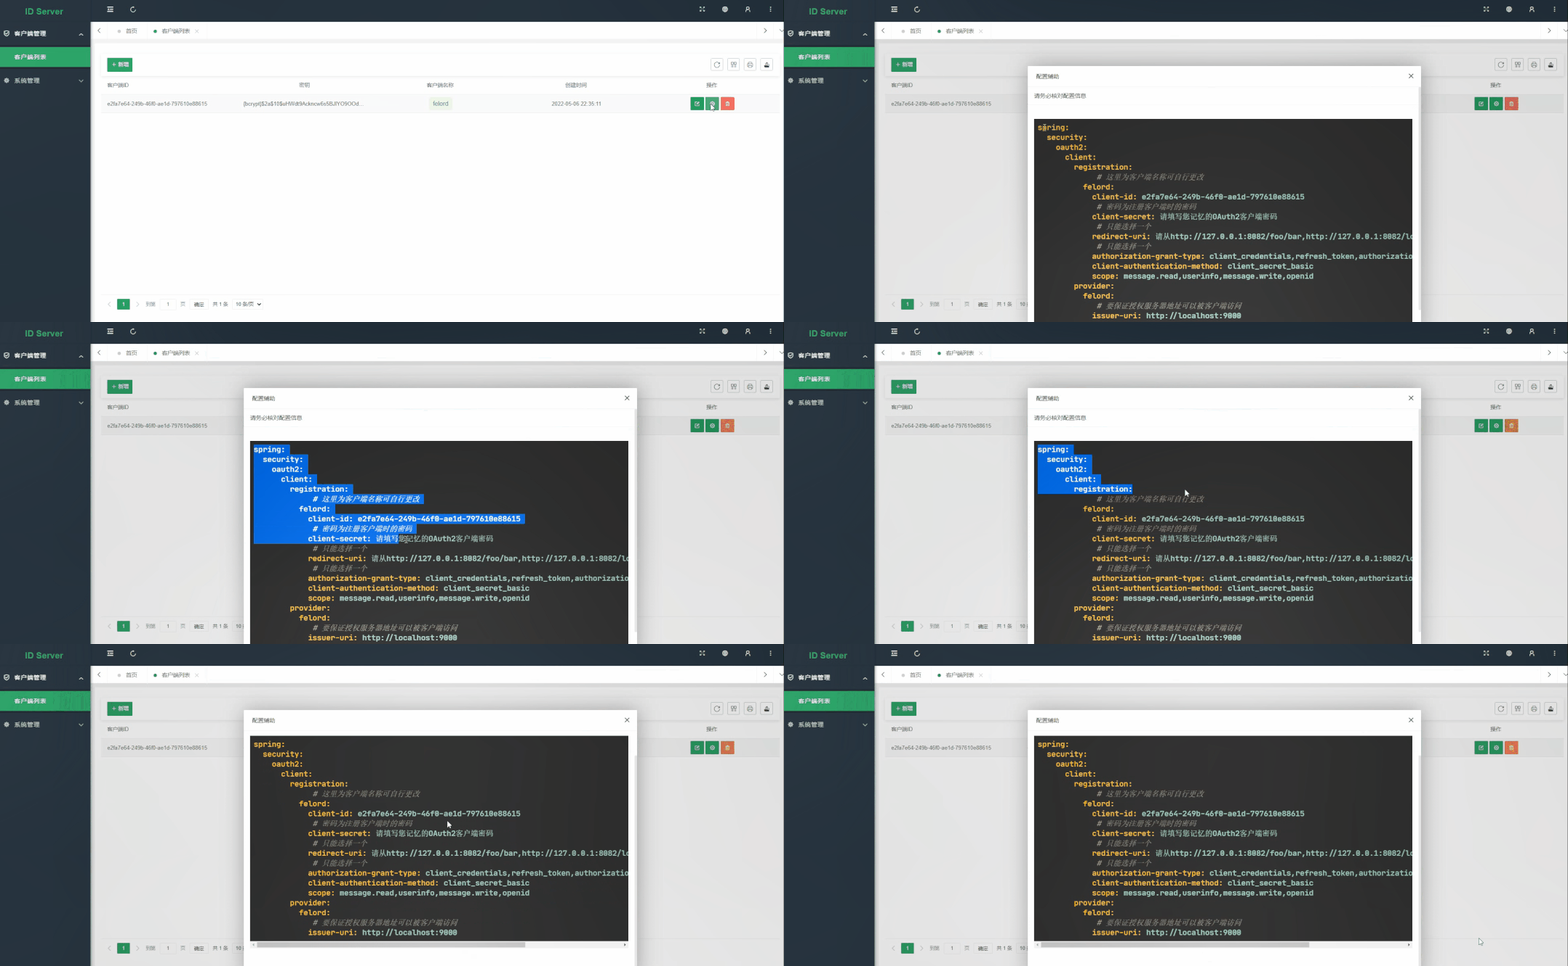
我们先来看看效果,点击配置生成按钮即可直接生成Spring Security的客户端yaml配置:

这个效果是如何实现的呢?
highlightjs
主要依托于highlightjs这个代码高亮库,平常我们在各大技术社区看到的五颜六色的代码块很多就依赖的这个JS库,连我自己的技术博客felord.cn都用了这个类库来做代码片段美化。它使用起来很简单:
html>
<html lang="en">
<head>
    <meta charset="UTF-8">
    <title>Titletitle>
    <link rel="stylesheet"
 href="https://felord.cn/css/gruvbox-dark.min.css">
    <script src="//cdnjs.cloudflare.com/ajax/libs/highlight.js/11.5.1/highlight.min.js">script>
    <script>hljs.initHighlightingOnLoad();script>
head>
<body>
<pre >
    <code class="yaml">
      spring:
        #
        application:
          name: id-server
    code>
pre>
body>
html>
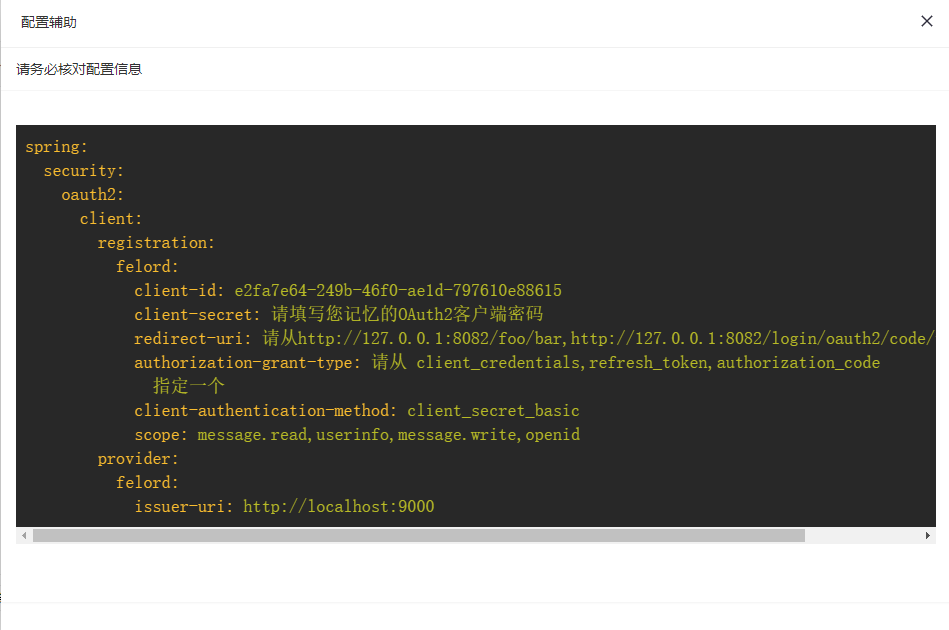
引入一个风格样式和highlight.js库,再加一个初始化脚本就完成了。然后在````
中编写带缩进的代码就可以了,注意code标签要加上对应语言或者脚本的class类,出来就是这样的效果:

## 实现
到这里思路就很明确了,把参数项的值动态化就可以了,我期望达到这样的效果:
<pre >
<code class="yaml">
spring:
#
application:
name: ${appName}
code>
pre>
但事实上我大意了,我用了**thymeleaf**模板,我没有找到**thymeleaf**可以固化配置项到页面的办法,所以这个带缩进的格式得后端生成,然后按照**thymeleaf**的要求渲染,于是我写了一个非常复杂的方法:
@GetMapping("/system/client/yaml/{id}")
public String yaml(Model model, @PathVariable String id) {
    OAuth2Client oauth2Client = clientRepository.findClientById(id);

    String clientName = oauth2Client.getClientName();
    String clientId = oauth2Client.getClientId();

    Set redirectUris = oauth2Client.getRedirectUris();
String uris = redirectUris.stream()
.map(RedirectUri::getRedirectUri)
.collect(Collectors.joining(","));
Set authorizationGrantTypes = oauth2Client.getAuthorizationGrantTypes();
String types = authorizationGrantTypes.stream()
.map(OAuth2GrantType::getGrantTypeName)
.collect(Collectors.joining(","));
String method = oauth2Client.getClientAuthenticationMethods().stream()
.map(ClientAuthMethod::getClientAuthenticationMethod)
.collect(Collectors.joining(","));
String scopes = Stream.concat(
oauth2Client.getScopes().stream()
.map(OAuth2Scope::getScope), Stream.of(OidcScopes.OPENID))
.collect(Collectors.joining(","));
LinkedHashMap client = new LinkedHashMap<>();
LinkedHashMap clientRegistration = new LinkedHashMap<>();
clientRegistration.put("client-id", clientId);
clientRegistration.put("client-secret", "请填写你的OAuth2客户端密码");
clientRegistration.put("redirect-uri", "请从" + uris + "指定一个");
clientRegistration.put("authorization-grant-type", "请从 " + types + " 指定一个");
clientRegistration.put("client-authentication-method", method);
clientRegistration.put("scope", scopes);
client.put("registration",
Collections.singletonMap(clientName, clientRegistration));
client.put("provider", Collections.singletonMap(clientName,
Collections.singletonMap("issuer-uri", "http://localhost:9000")));
Map spring =
Collections.singletonMap("spring",
Collections.singletonMap("security",
Collections.singletonMap("oauth2",
Collections.singletonMap("client", client))));
DumperOptions dumperOptions = new DumperOptions();
dumperOptions.setDefaultFlowStyle(DumperOptions.FlowStyle.BLOCK);
Yaml yaml = new Yaml(dumperOptions);
String dump = yaml.dump(spring);
model.addAttribute("yaml", dump);
return "/system/client/yaml";
}
效果自然是有的,但是非常差强人意。

无法生成注释,而且换行不受控制,尤其套了9个**Map**让我抓狂。
## 优化
是不是我把问题想得太复杂了呢?于是最终我把yaml的格式模板这样做了:
    String yml = "spring:\n" +
            " security:\n" +
            " oauth2:\n" +
            " client:\n" +
            " registration:\n" +
            " # 这里为客户端名称可自行更改\n" +
            " " + clientName + ":\n" +
            " client-id: " + clientId + "\n" +
            " # 密码为注册客户端时的密码\n" +
            " client-secret: 请填写您记忆的OAuth2客户端密码\n" +
            " # 只能选择一个\n" +
            " redirect-uri: 请从" + uris + "指定一个\n" +
            " # 只能选择一个\n" +
            " authorization-grant-type: " + types + "三选一\n" +
            " client-authentication-method: " + method + "\n" +
            " scope: " + scopes + "\n" +
            " provider:\n" +
            " " + clientName + ":\n" +
            " # 要保证授权服务器地址可以被客户端访问\n" +
            " issuer-uri: http://localhost:9000";

    model.addAttribute("yaml", yml);
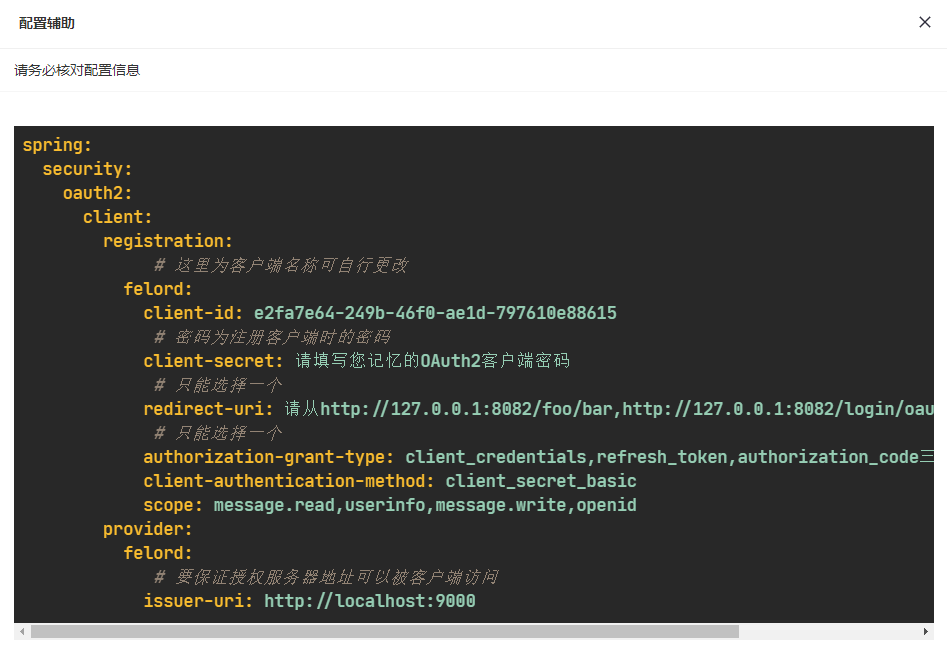
当然这是为了兼容**Java8**,如果换了**Java17**直接就用字符串模板了,甚至这里我还能写注释,最终的效果是这样的:

效果比上一个方案好了很多,当然或许你还有更好的方案,让我们集思广益。
# 关于Id Server
>
> 仓库地址:[https://github.com/NotFound403/id-server](https://blog.csdn.net/biggbang) 欢迎star。
>
>
>
[Id Server](https://blog.csdn.net/biggbang)是一个基于**Spring Authorization Server**的开源的授权服务器,大大降低**OAuth2**授权服务器的学习使用难度,提供**UI**控制台,动态权限控制,方便**OAuth2**客户端管理,可以一键生成**Spring Security**配置,开箱即用,少量配置修改就可部署,代码开源,方便二次开发,支持**OAuth2**四种客户端认证方式和三种授权模式。欢迎学习使用并参与代码贡献。
关注公众号:Felordcn 获取更多资讯
[个人博客:https://felord.cn](https://blog.csdn.net/biggbang)转载请注明:xuhss » OAuth2授权服务器Id Server一键生成配置原理