? 优质资源分享 ?
| 学习路线指引(点击解锁) | 知识定位 | 人群定位 |
|---|---|---|
| ? Python实战微信订餐小程序 ? | 进阶级 | 本课程是python flask+微信小程序的完美结合,从项目搭建到腾讯云部署上线,打造一个全栈订餐系统。 |
| ?Python量化交易实战? | 入门级 | 手把手带你打造一个易扩展、更安全、效率更高的量化交易系统 |
0.背景
最近在学习linux webserver开发,需要在linux下调试自己的C/C++代码,但是linux下不像在windows下,直接Visio Studio或者其它集成开发环境那么方便,现在的linux下开发,比较麻烦。于是可以考虑使用VScode远程开发。但是网上的很多教程都不是很清晰,这里在尝试了很多教程后,踩了不少坑,最后总结如下。
1.系统配置
远程系统:ubuntu18.04(虚拟机)
开发主机:windows10
2.ubuntu远程端安装软件和设置
(1)安装必要软件:ssh(系统通信),gdb,gsdbserver(代码调试):
sudo apt-get install openssh-server
sudo apt-get install gdb
sudo apt-get install gdbserver
(2)创建测试文件夹和文件
注意:
- 虽然你可能想一步到位,直接拿自己最后的程序测试,但是这里不建议这么做,建议先新建一个hello,world程序测试,成功后再调试自己的代码。
- 文件夹位置和内容无所谓,但是最好简单一些
cd ~/桌面
mkdir testvs
cd testvs
touch main.cpp
gedit main.cpp
其中main.cpp代码为:
#include

int main()
{
    int a = 1;
    printf("hello world\n");
    getchar();
    return 0;
}
(3)编译,得到可执行文件
g++ main.cpp -o main -g
注意:
- 加-g选项,不然没法用gdb调试
- 运行后testvs文件夹下有main.cpp和main两个文件
(4)启动gdbserver
(4.1)首先看一下自己的ubuntu系统ip地址:
hostname -I
可以得到本地ip地址为192.168.199.131
(4.2)启动gdbserver(注意更改ip地址和测试文件目录)
gdbserver 192.168.199.131:2000 ~/桌面/testvs/main
3.主机VScode设置
(1)首先在VScode中安装下面几个插件:
- C/C++
- C/C++ Extension Pack
- Remote - SSH
- Remote Development
(2)ssh远程连接
左下角“管理”->"控制面板",之后找到选项“Remote-SSH:Connect to Host...” -> Add New SSH Host...
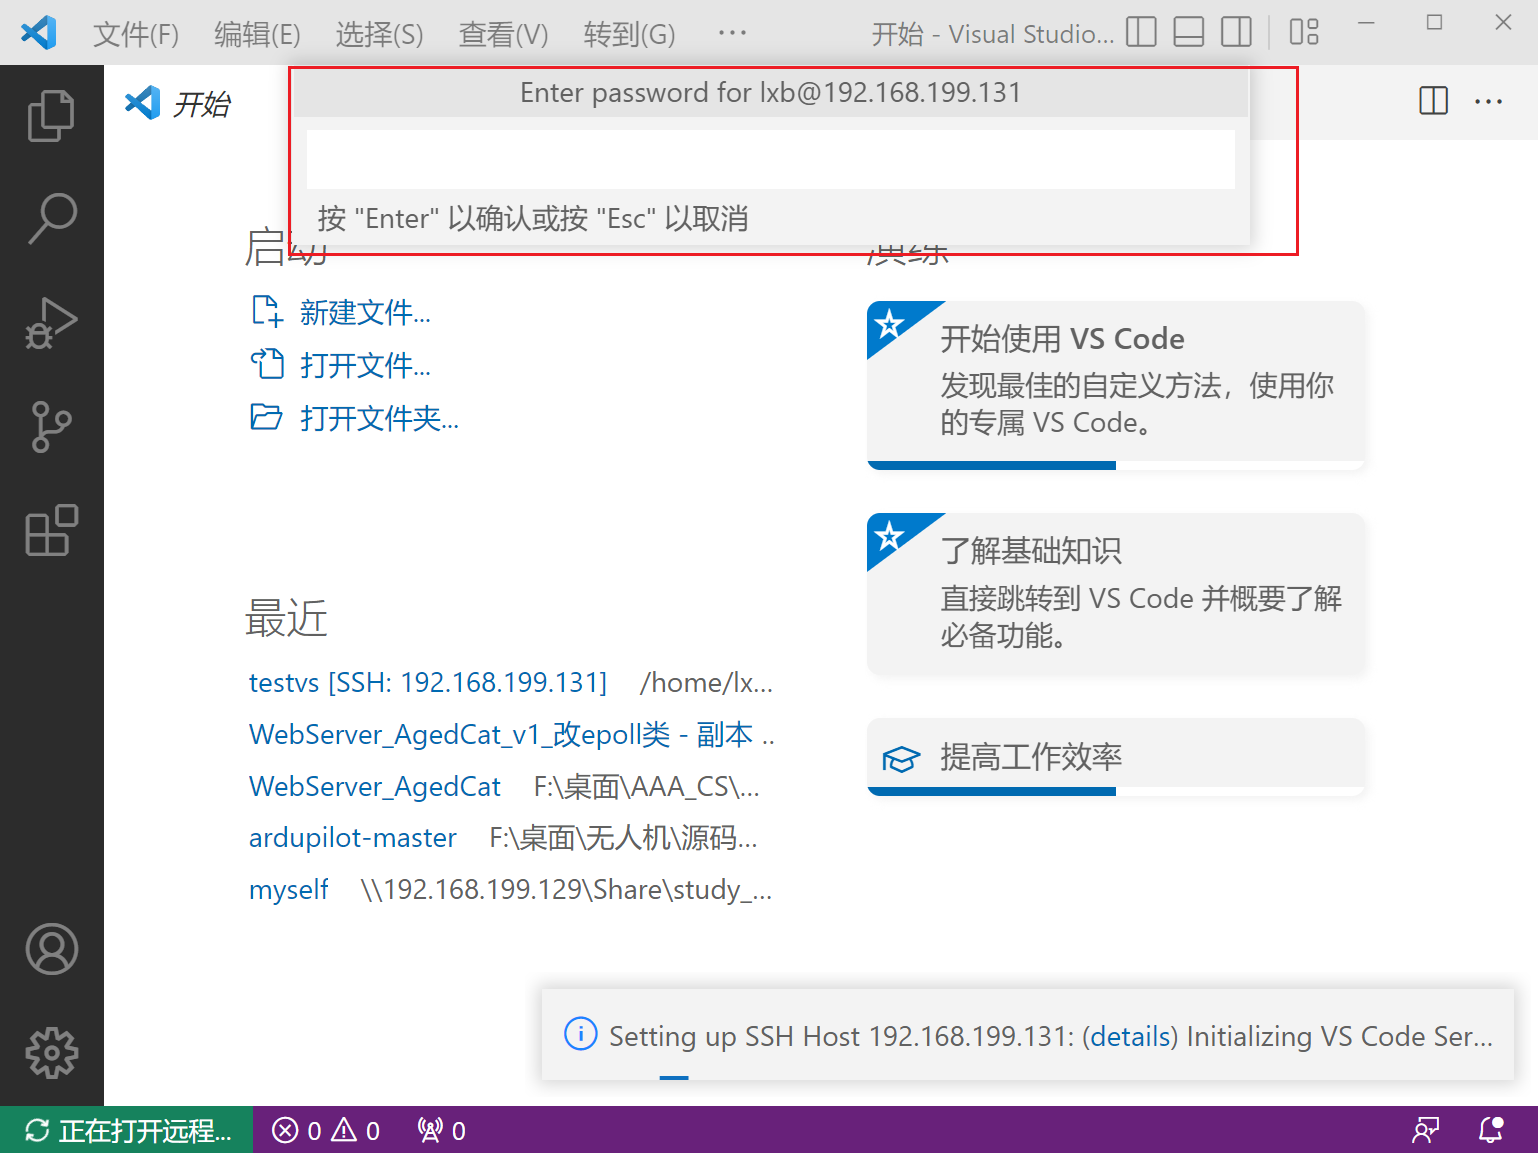
输入ubuntu系统ip地址,出来新界面
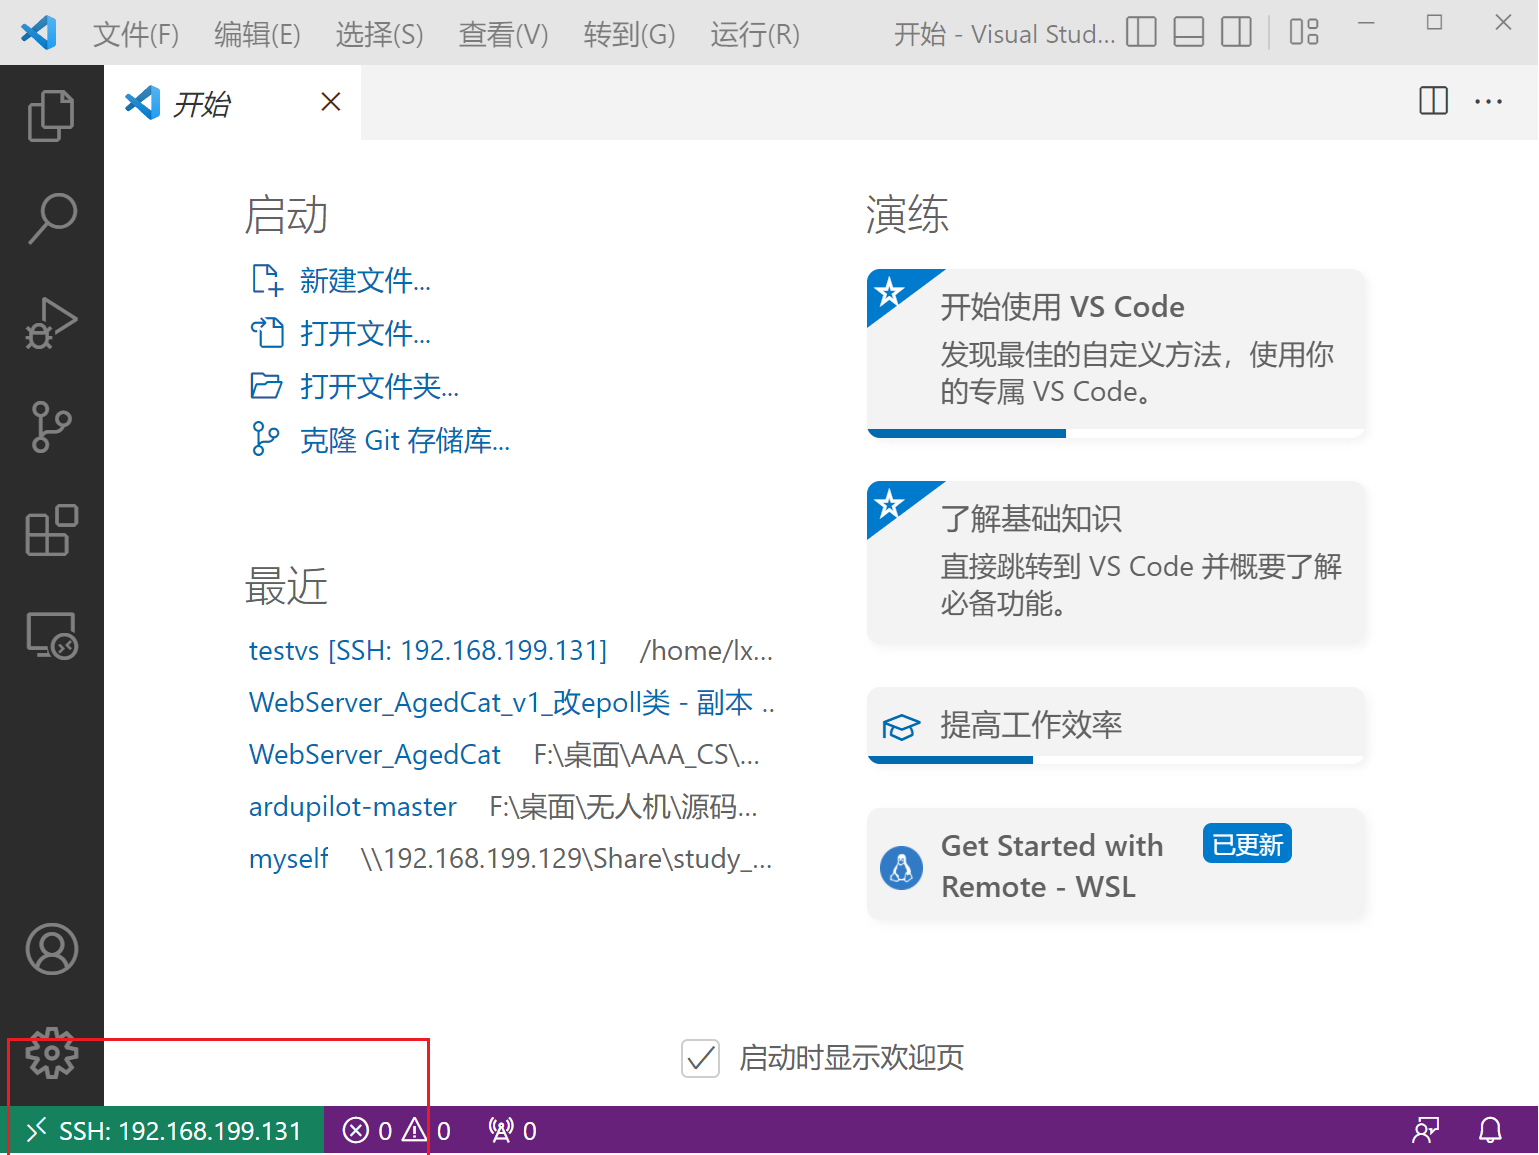
红框内输入ubuntu系统密码,左下角显示绿色ip地址即连接成功,如下图。
(3)打开测试文件
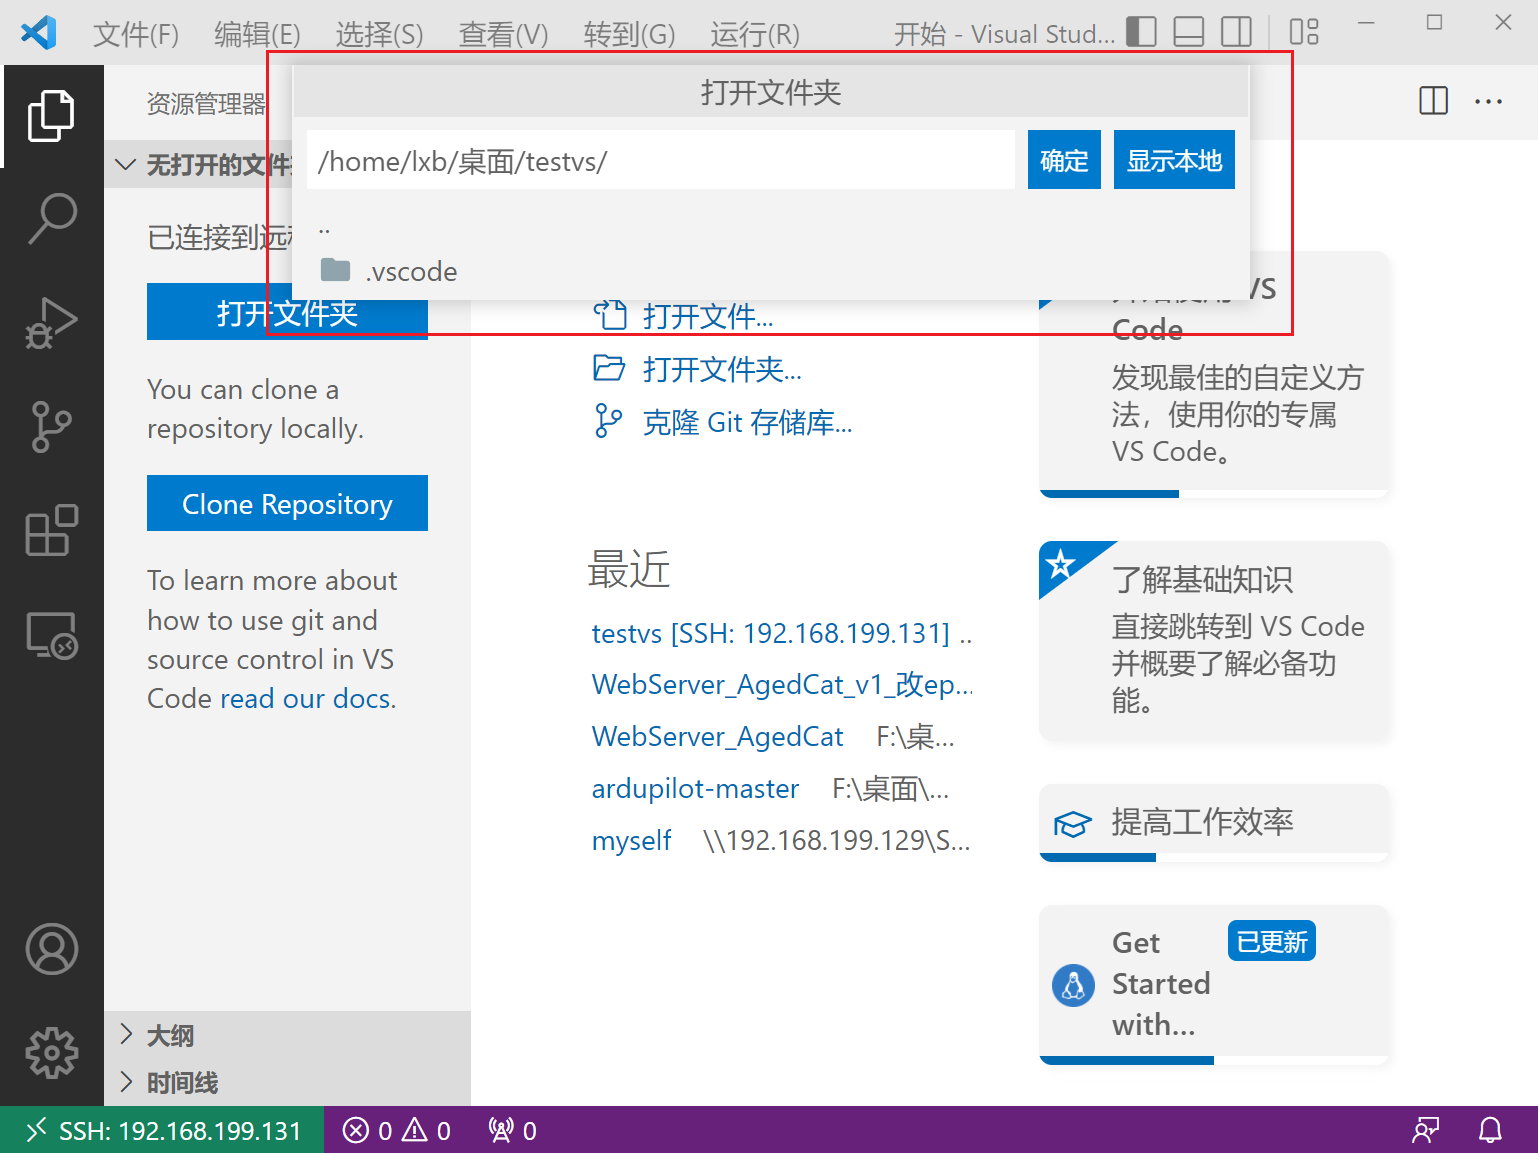
打开文件夹 -> 选择测试文件夹目录,点“确定”按钮
选中C/C++扩展,“在SSH:XXX中安装”。C/C++ Extension Pack扩展同理
然后重启Vscode和Ubuntu中的gdbserver(一定得要重启,否则接下来的步骤会报错)重新执行上述远程连接流程。
(4)设置配置文件
(4.1)配置tasks.json
从菜单栏选择Terminal>Configure Default Build Task, 在下拉栏里选择C/C++: g++ build active file. 之后生成tasks.json文件,将内容更换为:
{
    // 有关 tasks.json 格式的文档,请参见
     // https://go.microsoft.com/fwlink/?LinkId=733558
     "version": "2.0.0",
     "tasks": [
     {
     "type": "shell",
     "label": "g++ build active file",
     "command": "/usr/bin/g++",
     "args": [
     "-std=c++11",
     "-g",
     "${file}",
     "-o",
     "${fileDirname}/${fileBasenameNoExtension}"
     ],
     "options": {
     "cwd": "/usr/bin"
     },
     "problemMatcher": [
     "$gcc"
     ],
     "group": {
     "kind": "build",
     "isDefault": true
     }
     },
     { //删除二进制文件
     "type": "shell",
     "label": "delete output file",
     "command": "rm",
     "args": [
     "${fileDirname}/${fileBasenameNoExtension}"
     ],
     "presentation": {
     "reveal": "silent", //删除过程不切换终端(专注程序输出)
     }
     }
     ]
    }
(4.2)配置launch.json
在菜单栏选择Debug>Add Configuration, 选择C++ (GDB/LLDB), 在下拉栏中选择g++ build and debug active file.生成launch.json,内容更改为:
{
    // 使用 IntelliSense 了解相关属性。
    // 悬停以查看现有属性的描述。
    // 欲了解更多信息,请访问: https://go.microsoft.com/fwlink/?linkid=830387
    "version": "0.2.0",
    "configurations": [
    {
    "name": "g++ build and debug active file",
    "type": "cppdbg",
    "request": "launch",
    "program": "${fileDirname}/${fileBasenameNoExtension}",
    "args": [],
    "stopAtEntry": false,
    "cwd": "${workspaceFolder}",
    "environment": [],
    "externalConsole": false,
    "MIMode": "gdb",
    "setupCommands": [
    {
     "description": "为 gdb 启用整齐打印",
     "text": "-enable-pretty-printing",
     "ignoreFailures": true
    }
    ],
    "preLaunchTask": "g++ build active file",
    "postDebugTask": "delete output file",
    "miDebuggerPath": "/usr/bin/gdb"
    }
    ]
   }
4.运行调试
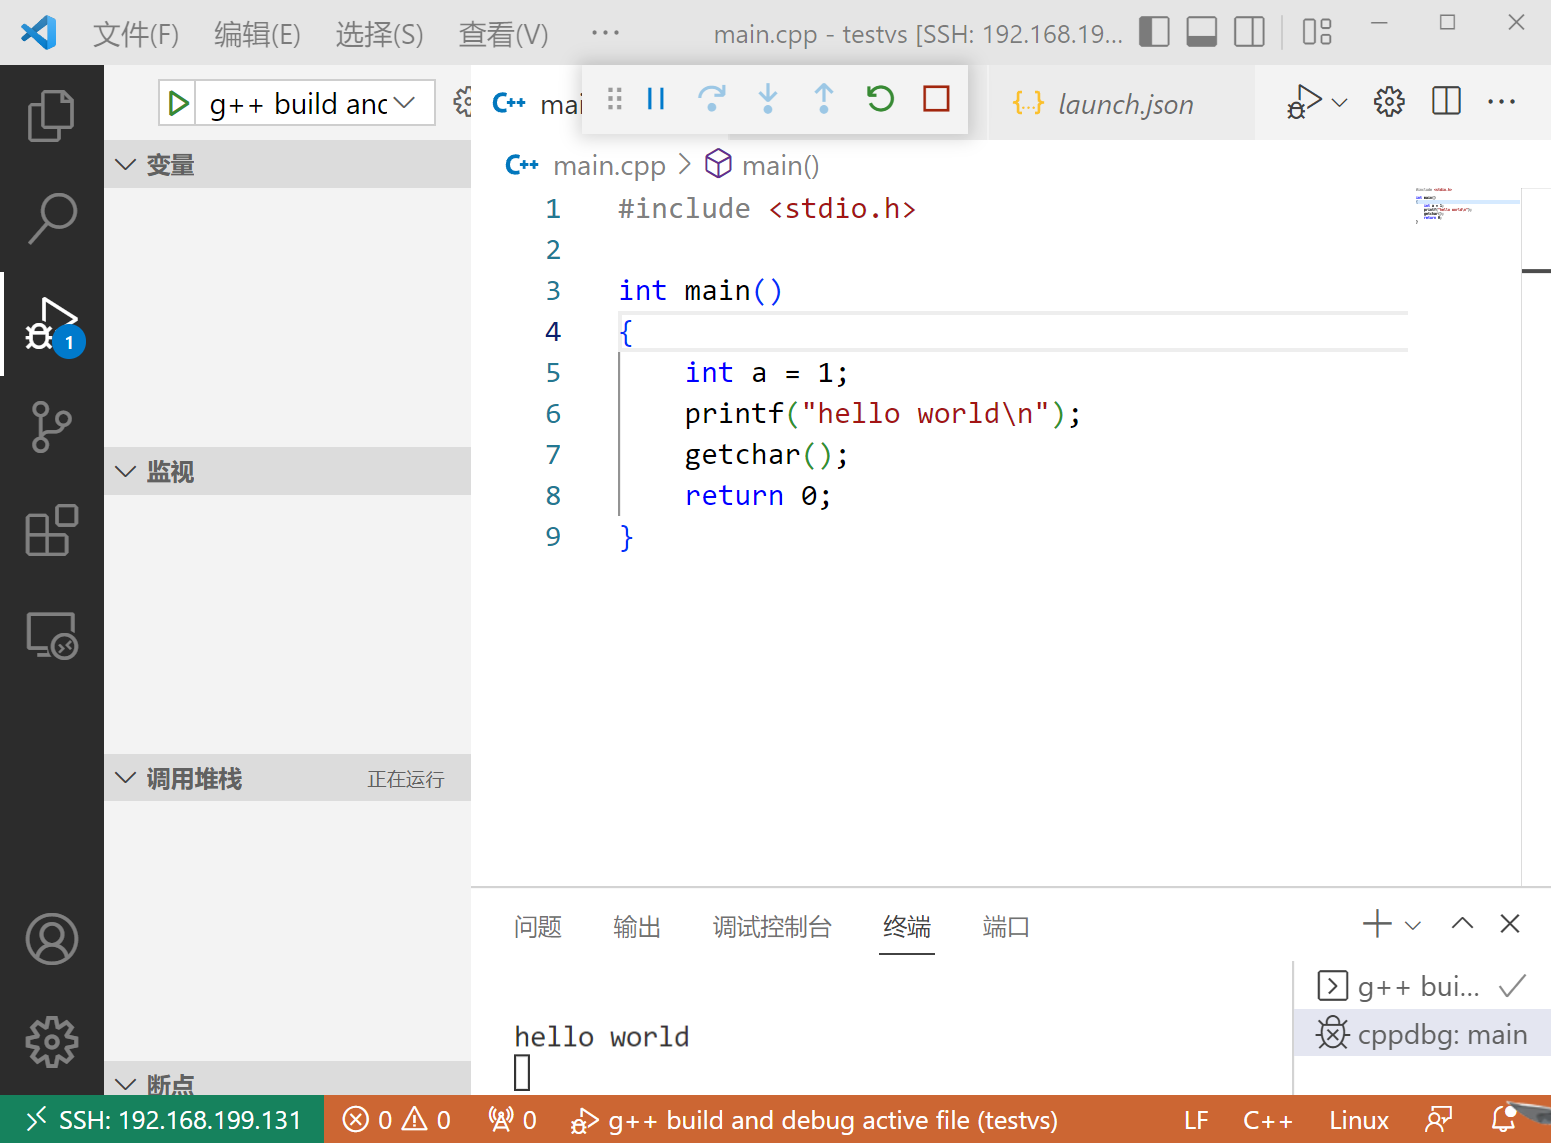
在main.cpp下调试运行即可
转载请注明:xuhss » vscode远程调试c++