Python微信订餐小程序课程视频
https://blog.csdn.net/m0_56069948/article/details/122285951
Python实战量化交易理财系统
https://blog.csdn.net/m0_56069948/article/details/122285941
我们继续上一章的内容,上一章讲到我们已经能将项目成功跑起来了,那么我们接下来把项目必用的东西完善一下。
一、安装elementUI
终于到了我们的男二了,继续在VSCode中新建一个终端,然后通过这个命令来安装:
npm i element-ui -S至于为什么要-S呢?即--save(保存)包名会被注册在package.json的dependencies里面,在生产环境下这个包的依赖依然存在。
安装完成之后呢,我们要通过导入才能在项目中使用,可以在main.js中做全局引用:
import Vue from 'vue'
import App from './App.vue'
//引入elementUI
import ElementUI from 'element-ui';
import 'element-ui/lib/theme-chalk/index.css'; //样式文件一定要引入

Vue.config.productionTip = false

Vue.use(ElementUI)
new Vue({
 render: h => h(App),
}).$mount('#app')
这样就可以做到全局引入,如果在实际开发中用到UI框架的插件没有很多,也是可以通过按需引入的,下面来说说如何按需引入:
import { Message} from 'element-ui';
Vue.use(Message)
上面就是引入一个Message弹窗的功能,也就是element中的内容只有这个可以用,还是觉得挺麻烦的哈。
好了,导入和装载完毕之后,我们测试一下看看有没有成功。
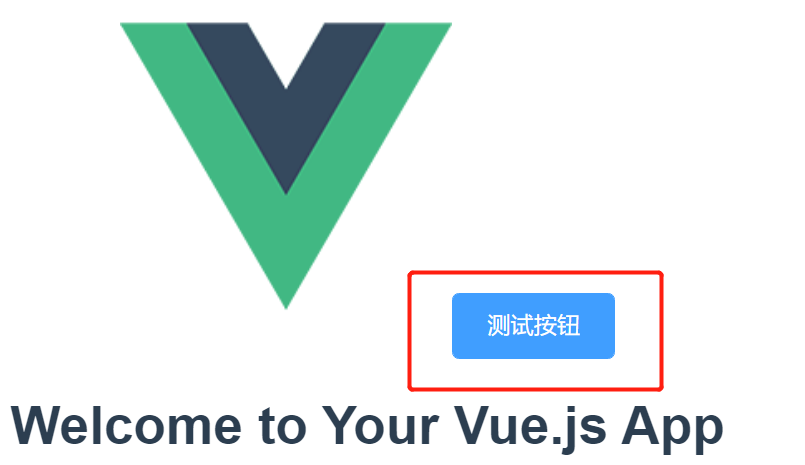
在App.vue文件中加入button组件,然后保存查看,可以看到网页中已经成功渲染按钮组件了。
<template>
  <div id="app">
    <img alt="Vue logo" src="./assets/logo.png">
    <el-button type="primary">测试按钮el-button>
 <HelloWorld msg="Welcome to Your Vue.js App"/>
 div>
template>
二、安装路由
由于Vue在开发时对路由支持的不足,于是官方补充了vue-router插件。
Vue的单页面应用是基于路由和组件的,路由用于设定访问路径,并将路径和组件映射起来。
在终端中通过这个命令安装:
npm install vue-router -S安装完成之后,同样在main.js中挂载它。我们项目src的目录下创建一个router文件夹,用于存放路由映射文件。
在router文件夹下创建index.js和routers.js,分别用于初始化路由和配置路由映射。代码如下:
index.js:
import Vue from 'vue';
import Router from 'vue-router';
import constantRoutes from './routers';

const originalPush = Router.prototype.push;
Router.prototype.push = function (location) {
 return originalPush.call(this, location).catch(err => err);
};

Vue.use(Router);

const createRouter = () => new Router({
 scrollBehavior: () => ({ y: 0 }),
 routes: constantRoutes
})

const router = createRouter()

export function resetRouter() {
 const newRouter = createRouter()
 router.matcher = newRouter.matcher
}

/**
 * 全局前置守卫
 * @func beforeEach
 * @param {object} to 即将要进入的目标 路由对象
 * @param {object} form 当前导航正要离开的路由
 * @func next 进行管道中的下一个钩子
 */
router.beforeEach(async (to, form, next) => {

});

/**
 * 全局后置钩子
 * @func afterEach
 * @param {object} to 即将要进入的目标 路由对象
 * @param {object} form 当前导航正要离开的路由
 */
router.afterEach((to, form) => { });

export default router;
routers.js:
/**
 * 逐个导出模块
 */
export const constantRoutes = [
 {
 path: '/',
 redirect: '/home'
 },
]

export default [
 ...constantRoutes,
];
然后在main.js中做好配置:
import Vue from 'vue'
import App from './App.vue'
//引入elementUI
import ElementUI from 'element-ui';
import 'element-ui/lib/theme-chalk/index.css'; //样式文件一定要引入

//载入路由
import router from './router/index.js';

Vue.config.productionTip = false

Vue.use(ElementUI)
new Vue({
 router,
 render: h => h(App),
}).$mount('#app')
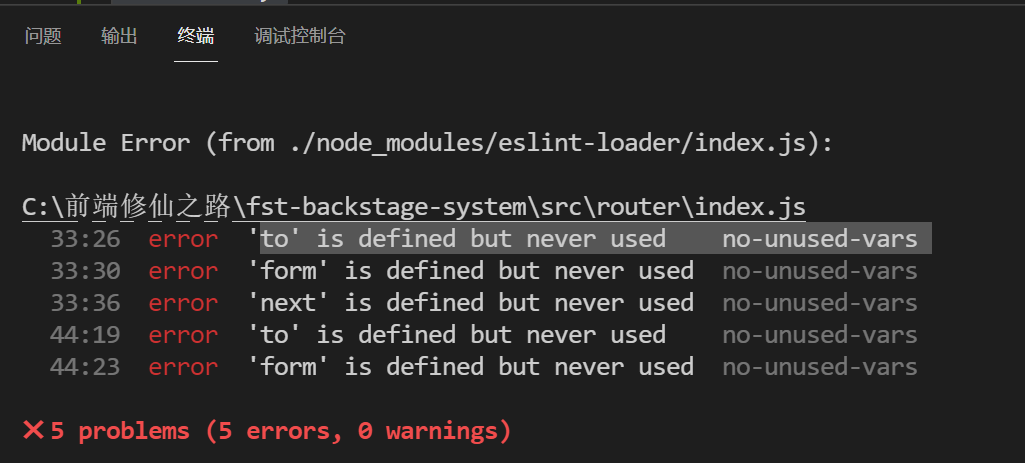
保存之后,可能会报ESLint校验规则的错:

我们先不配置代码校验规则先,后面我们再单独讲代码编写规范。
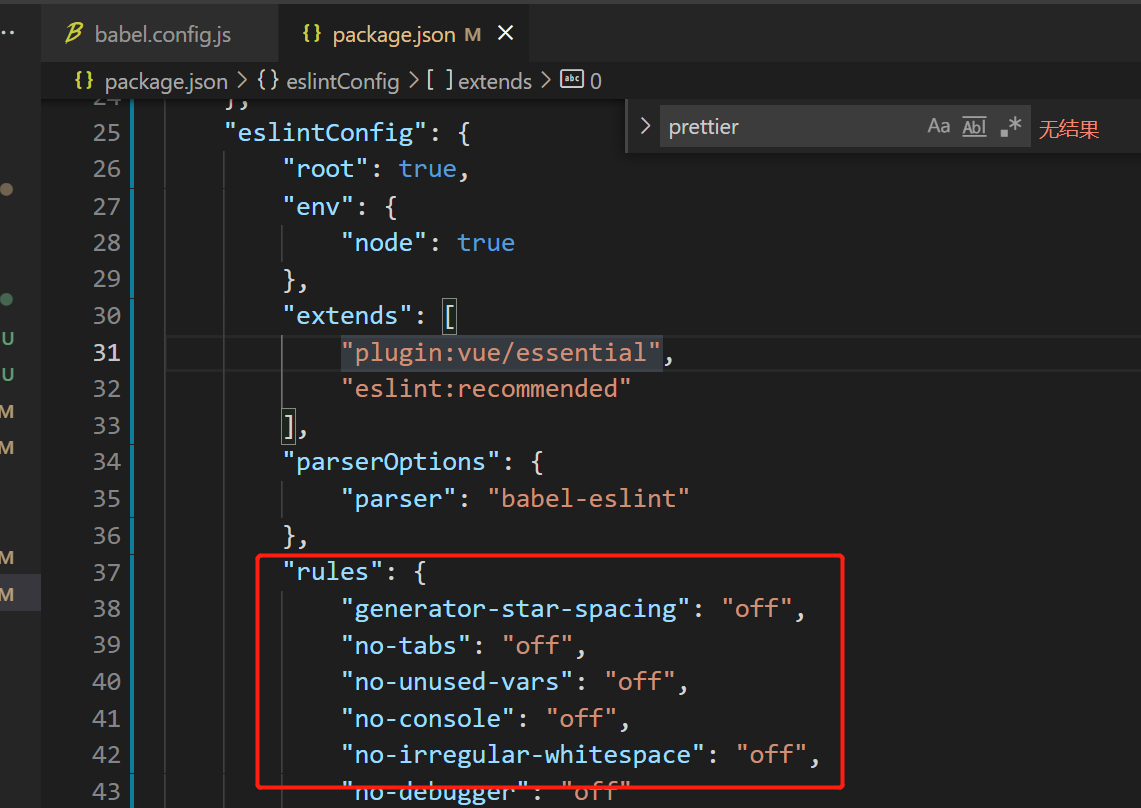
去掉代码校验的话,在package.json文件的eslintConfig字段中,加入这些代码,然后重启项目,就可以了。
"rules": {
 "generator-star-spacing": "off",
 "no-tabs": "off",
 "no-unused-vars": "off",
 "no-console": "off",
 "no-irregular-whitespace": "off",
 "no-debugger": "off"
 }
然后我们的路由安装就算完成了。
三、安装Vuex
在开发大型项目的过程中,还是会常常用到vuex的,关于vuex官方的解释是:vuex是专门用来管理vue.js应用程序中状态的一个插件。他的作用是将应用中的所有状态都放在一起,集中式来管理。描述可能会有些晦涩难懂,不理解的同学,我们边用边学。
在终端中通过这个命令来安装:
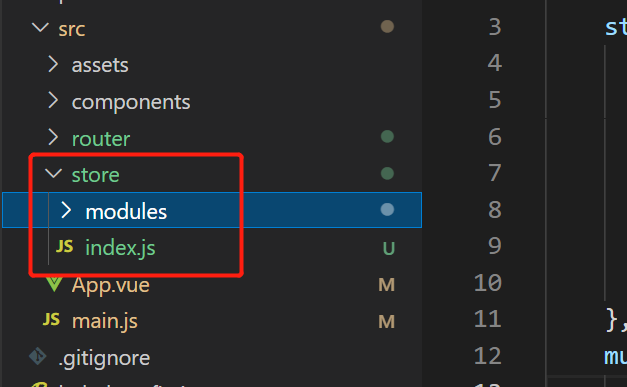
npm install vuex --S静静等待安装完成后,我们将它装载在Vue中,步骤跟装载路由差不多,现在src目录下创建store文件夹,然后创建index.js
import Vue from 'vue';
import Vuex from 'vuex';

const modulesFiles = require.context('./modules', true, /\.js$/)
const modules = modulesFiles.keys().reduce((modules, modulePath) => {
 const moduleName = modulePath.replace(/^\.\/(.*)\.\w+$/, '$1')
 const value = modulesFiles(modulePath)
 modules[moduleName] = value.default
    return modules
}, {})

Vue.use(Vuex);
export default new Vuex.Store({
 modules: modules
});
再在store文件夹下创建modules文件夹,主要用于存放状态数据模块文件的,先不用创建文件:

然后就是在main.js中装载vuex,
import Vue from 'vue'
import App from './App.vue'
//引入elementUI
import ElementUI from 'element-ui';
import 'element-ui/lib/theme-chalk/index.css'; //样式文件一定要引入

//载入路由
import router from './router/index.js';

//载入vuex
import store from './store/index.js'

Vue.config.productionTip = false

Vue.use(ElementUI)
new Vue({
 store,
 router,
 render: h => h(App),
}).$mount('#app')
装载好之后,如果没报错的话,那么对于必要的三件套已经是安装完成了。
其实还有一个插件是必用的,就是关于网络请求的,但这篇内容已经很多了,后面用单独一章来帮助大家了解怎么封装网络请求和装哪个网络请求的插件。
好了,这章的内容就先到这了,下一章说一下完善项目的架构。
转载请注明:xuhss » Vue+element搭建后台管理系统-二、安装插件